rss
twitter
    Find out what I'm doing, Follow Me :)

New Sneaky Trojan Makes its Home in PC Motherboard


Security researchers have found a nasty new virus that borrows in to a computer's motherboard, infects PCs as soon as they boot up, and is particularly difficult to detect and dispose of.

The security firm Symantec identified the threat as Trojan.Mebromi, a piece of rootkit malware — malicious software that hides its presence on infected systems — that worms its way onto the basic input-output system (BIOS) built into a computer's motherboard.

Once it's gotten into the BIOS via an attached corrupt file, Mebromi then loads itself onto the PC's master boot record (MBR), another component that gets executed prior to the loading of a computer's operating system.
Pull Data into Excelofficewriter.com/excel
Server-side document generation SSRS + SharePoint. Free Eval!
SharePoint List Enhancerspapps.cybozu.com
Simple & Powerful tools built on top of Office 365 / SharePoint 2010
Rs. 30000 Monthly Earningwww.technicalcources.freevar.com
Learn Mobile Repairing Course Join Now and Get Rs. 3000 Discounts
Ads by Google

Think of it in terms of the human body: Mebromi doesn't infect the bloodstream on the way to the heart; it gets into the heart first and then takes control from there.

And as a doctor might toil to treat such a case, anti-virus companies could face a similar struggle.

Because Mebromi stores itself inside the BIOS, anti-virus software would need to effectively remove the Trojan without damaging the motherboard it's hiding under.

Added to that problem is Mebromi's persistence: it could potentially keep executing itself every time a user turns on his computer.

"Even if an anti-virus detects and cleans the MBR infection, it will be restored at the next system startup when the malicious BIOS payload would overwrite the MBR code again," Marco Giuliani from the security company Webroot wrote.

To lower your risk of falling prey to this or any other computer viruses, make sure your computers and all other Internet-connected devices are equipped with anti-virus software.

* The 10 Worst Computer Viruses in History
* Cybercrime Ring Led by Russian 'Soldier' Steals $3.2 Million
* Anti-Malware Software Review


Source : securitynewsdaily

Home Computer - Buy your own


It seems impossible, but just two decades ago, most homes did not have personal computers. Now, most homes have one or more, and they are usually replaced every 3 to 5 years with a newer model. Unfortunately, deciding which computer you want to buy can be a confusing and difficult process. Not only that, but a computer is a big investment--you certainly don't want to make the wrong choice! Follow the steps below to learn more about choosing the right computer for your home.

Instructions

1. Choose your hardware. Decide on what features you would like to have before setting out to buy your computer. One such feature is RAM. You will need a large amount of RAM if you are going to store a lot of photos or play a lot of video games. If you are going to be doing a lot of different tasks on the computer, you will probably want a good processor as well.

2. Choose your software. Think about what you are going to be doing on your computer. If you will just be doing basic word processing, you will only need the minimum Word programs. If you want to do a lot of computations, spreadsheets and the like, you might want to upgrade to an office or professional software package. If you like to edit and play with your digital photos, you will probably want some kind of photo editing software pre-installed as well, although you can always buy software after you buy the computer.

3. Think about extras. Do you want more than one CD/DVD drive? What about speakers, a microphone or Web cam? Now is the time to decide if you want a large monitor, a good, expensive video and/or sound card, and wireless Internet capabilities. Don't forget that you may need to purchase some cords as well.

4. Choose your brand. Different brands have different reputations. If brand name does not matter to you, then simply choose the price you want to spend. Otherwise, choose your brand and then see what price options that brand has available to you (see Resources below).

5. Shop around. Many stores offer very different computer prices and packages. Some online stores will have one-day-only sales, while some big box stores will have a sale on one particular brand, but not others.

Article Source: Ehow

How to Install a Network Printer?


A network printer is a term given to a printer that is shared by several computers across a common internet connection. Every computer that is connected to the network can access the printer and give the command to print. Network printing saves money and space. If you are on a shared internet connection and want to add a network printer to your computer, you can do so easily with a few


* 1: Select the "Start" menu from the lower-left corner of your computer's desktop.

* 2: Select "Control Panel" from the menu.

* 3: Double-click on the "Printers and Faxes" folder in the "Control Panel" window.

* 4: Choose "Add a Printer" from the left side of the open window and then select "Create a New Port."

* 5: Select "Standard TCP/IP Port" from the drop-down menu and enter the IP address for the network printer. If you have already installed the network printer, this is the address assigned to the printer during the first installation. If you are connecting to a network printer in a business, ask the IT department for the IP address.

* 6: Click "Next" and select the make and model of the printer.

* 7: Select "Finish" to complete the installation process.


Read more: http://www.ehow.com/how_6085411_install-network-printer-laptop.html#ixzz1XATpmFnP

How to Network Your Computers


It's not surprising that home networking is hot: Nearly 70 percent of U.S. households with broadband connections have more than one computer. If you want all your computers to share one Internet connection, this information will help you make the right choices.

Instructions

Learn the jargon

A router relays data between your broadband Internet connection and your individual computers.

A network adapter connects to each computer. It sends data from the computer to the router.

An Internet protocol (IP) address is your computer's unique identification on the Internet. When you have a home network, all your computers share one IP address.

A print server is a special network adapter that's used to connect a printer to a network. With a print server, several computers can share one printer.

Read more: http://goo.gl/1aFJp

repair corrupt system files in Windows Vista


During the average lifespan of a computer, it's normal for you to have to troubleshoot your operating system. Some very lucky computer users will never know what this is like, but most people will encounter a virus or other less-serious error that affects the structure of Windows Vista. In these circumstances, you may need to check the system files for Vista, and Windows itself has you covered: Microsoft included a helpful utility called the System File Checker to do just this.

Instructions


Boot your computer into Safe Mode, especially if you can't access the regular Windows Vista desktop due to a missing system file. Shut off your computer and wait a few seconds, then turn it back on and tap "F8" before the Windows splash screen loads to access the Advanced Startup Menu. Use the arrow keys to choose "Safe Mode" and press "Enter." This loads a driver-sparse version of Windows that is useful for troubleshooting.


Click "Start" and choose "All Programs" and then "Accessories." Right-click on "Command prompt" and choose "Run as Administrator." Click "Allow" if Windows prompts you to confirm that you are the computer administrator. The command prompt opens: this is a DOS-like interface where you can enter commands to run utilities for troubleshooting and repair.


Type "sfc /scannow" at the prompt (the flashing cursor) and press "Enter." This starts Windows System File Checker, which scans the Windows installation directory for any corrupt, missing or non-authenticated versions of the Vista files. By default, the program replaces the files that don't match with System File Checker's record of your Vista install. When dealing with a virus this is particularly helpful, since some viruses replace system files with lookalikes that have the same name but destructive purposes.


Read more: http://goo.gl/Kx3wA

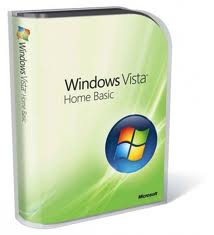
How to Install Windows Vista Home Basic Software


Install Windows Vista Home Basic software on your personal computer to support basic home computer usage needs such as email, Internet and organizing photos. Vista Home Basic was designed with the computer novice in mind and enables even the most inexperienced user to navigate his computer without difficulty. Vista Home Basic enables speedy browsing through files on the computer and includes security and safety tools.

Instructions

Verify that your computer meets all the system requirements for Windows Vista. The computer must have a 1 gigahertz (GHz) processor, 512 megabytes (MB) of system memory, 20 gigabyte (GB) available hard drive space on a 40 GB or larger hard drive and support for Super VGA graphics. If you are upgrading from Windows XP, you must have Service Pack 2 installed.

Back up all files and settings on your computer using a backup program. The Vista Home Basic installation disk includes "Windows Easy Transfer" and "Windows XP Backup" is built into Windows XP. This step is optional, but highly recommended.

Disable any antivirus software that is installed on the computer.

Insert the Windows Vista Home Basic edition DVD into your DVD drive. Alternately, if you have downloaded the software from the Windows Marketplace Web site, the software will open automatically.

Click "Install now" on the install screen that pops up once the DVD is read by the computer. Follow the onscreen prompts and read information provided during software installation.

Enter the 25 character product key. The key is located on a sticker inside the installation disk holder or on the back or bottom of your computer. You must also read and accept the license terms.

Click "Upgrade" when the setup box appears on the computer screen. If you are not upgrading, click "Custom." Continue to follow the instructions and prompts on the screen until installation is complete. You will be provided information about what is new in Windows Vista and tips on how to use the software.

Read more: http://goo.gl/R8EV7

How to Install Virtual PC on Vista Home Premium

How to Install Virtual PC on Vista Home Premium
Without an operating system, your computer is just a bunch of parts. The operating system lets you input commands via mouse and keyboard, it allows programs to run and gives you access to data. One PC may contain multiple operating systems, but only one operating system can be in control--although you may run additional operating systems virtually. In a "virtual machine"--a window that behaves as though it were a separate computer--you can run another operating system, say Windows XP on a PC that actually runs Windows 7, or a totally discrete copy of the same OS you use normally--Windows Vista on a PC already running Windows Vista, for example. You might use these scenarios to test software to make sure it will run properly, to provide support to someone using another OS, or to tinker with settings without the risk of taking down your real system.

Microsoft's Virtual PC is one of several virtualization applications, and Microsoft provides it as a free download. Installing the program itself is quite simple; prepping your computer for it takes a few more steps, including at least one reboot.

Instructions

Visit the Virtual PC home page (see link in References). Confirm that your computer meets the required specifications by clicking on the "Requirements" tab. Ignore the first requirement, "Hardware Virtualization Technology enabled" for now.

Click on the "Configure BIOS" tab to address the "Hardware Virtualization Technology enabled" issue. Click on the link labeled "Hardware-Assisted Virtualization Detection Tool." On the subsequent page, click the "Download" link next to "havdetectiontool.exe." Either save the tool, then run it, or simply click "Run" to run the tool immediately.

Configure your BIOS for hardware virtualization. If the Hardware-Assisted Virtualization Detection Tool indicates it's already configured, skip to Step 7.

Click on the "Configure BIOS" tab on the Virtual PC home page. Select your computer brand from the "Sample instructions for your PC" list. If your PC brand does not appear on the list, you must consult your user's manual or contact the PC's support line.

Copy and paste the instructions indicated for your computer to a document and print them out.

Open your browser and return to the Virtual PC page.

Click on the "Virtual PC 2007" tab. Click on the "Download Virtual PC 2007" link.

Choose the 32-bit or the 64-bit download, depending on which type of operating system you have. If you're unsure, click on the "Start" menu, choose "Control Panel," then in the Control Panel click on "System and Maintenance," then "System." In the "View basic information about your computer" window that appears, find the line "System type" and note whether it says "32-bit Operating System" or "64-bit Operating System."

Save the setup file to your desktop or your default download location. After the download is complete, double-click on the setup file to begin installation.

Click "Next" to begin. Accept the license terms and click "Next."

Check the pre-populated fields (name and so forth), make any changes you need to and then click "Next."

Click "Install." When the installation is complete, click "Finish."

Read more: http://goo.gl/vD3Zp